Getting started
RequestTailor needs no account and no sign-in. You get the app, open a folder with a collection, choose an environment and send. On the next start the app reopens the last collection and request, so sending again takes at most two keystrokes.
- Platforms
- Mac app, web app in the browser, rt for macOS and Linux
- Account
- none, no sign-in, no network connection at start
- Send
- Mod+Enter (⌘↩ on the Mac)
- Command palette
- Mod+K
Install
RequestTailor comes in three forms, all with the same Rust core1:
| Form | For |
|---|---|
| Mac app | macOS on Apple silicon and Intel, signed and notarised. Open the disk image and drag RequestTailor to Applications. |
| Web app | A current browser with WebAssembly – on Windows and Linux too. The browser opens the folder through its file access. |
| rt | Command line for macOS and Linux (x86_64, aarch64), plus a Docker image and a GitHub Action. See rt command line. |
There are no desktop installers for Windows and Linux2; use the web app or rt there. An iPad app follows later.
First start
At first start the app asks once: What do you work with? If you choose SAP and OData, it switches on the bundled OData plugin; with Skip or no choice it stays off. You can change this at any time under Manage plugins…. Nothing else happens at first start: no account, no sign-in, no network connection3.
Send your first request
- At the top left choose Open folder (Mod+O) and open a folder with an
opencollection.yml– for example a Bruno collection in OpenCollection format from your repository. Or create a collection from Postman, Insomnia, OpenAPI, cURL, HAR or.httpwith Import (Import). - Choose an environment at the top right. You enter secret variables once under Environments; their values live in the keychain, not in the folder (Environments and variables).
- Click a request in the Requests sidebar.
- Send it with Mod+Enter or Send. The response shows status, time, size, headers, tests and the formatted body (Sending requests).
After that the collection is an ordinary folder: save changes with Mod+S and commit them with the built-in Git view or any other Git tool (Git).
Command palette and shortcuts
Everything the app can do is in the command palette: Mod+K or the ⌘K button at the top right. Typing filters the commands.
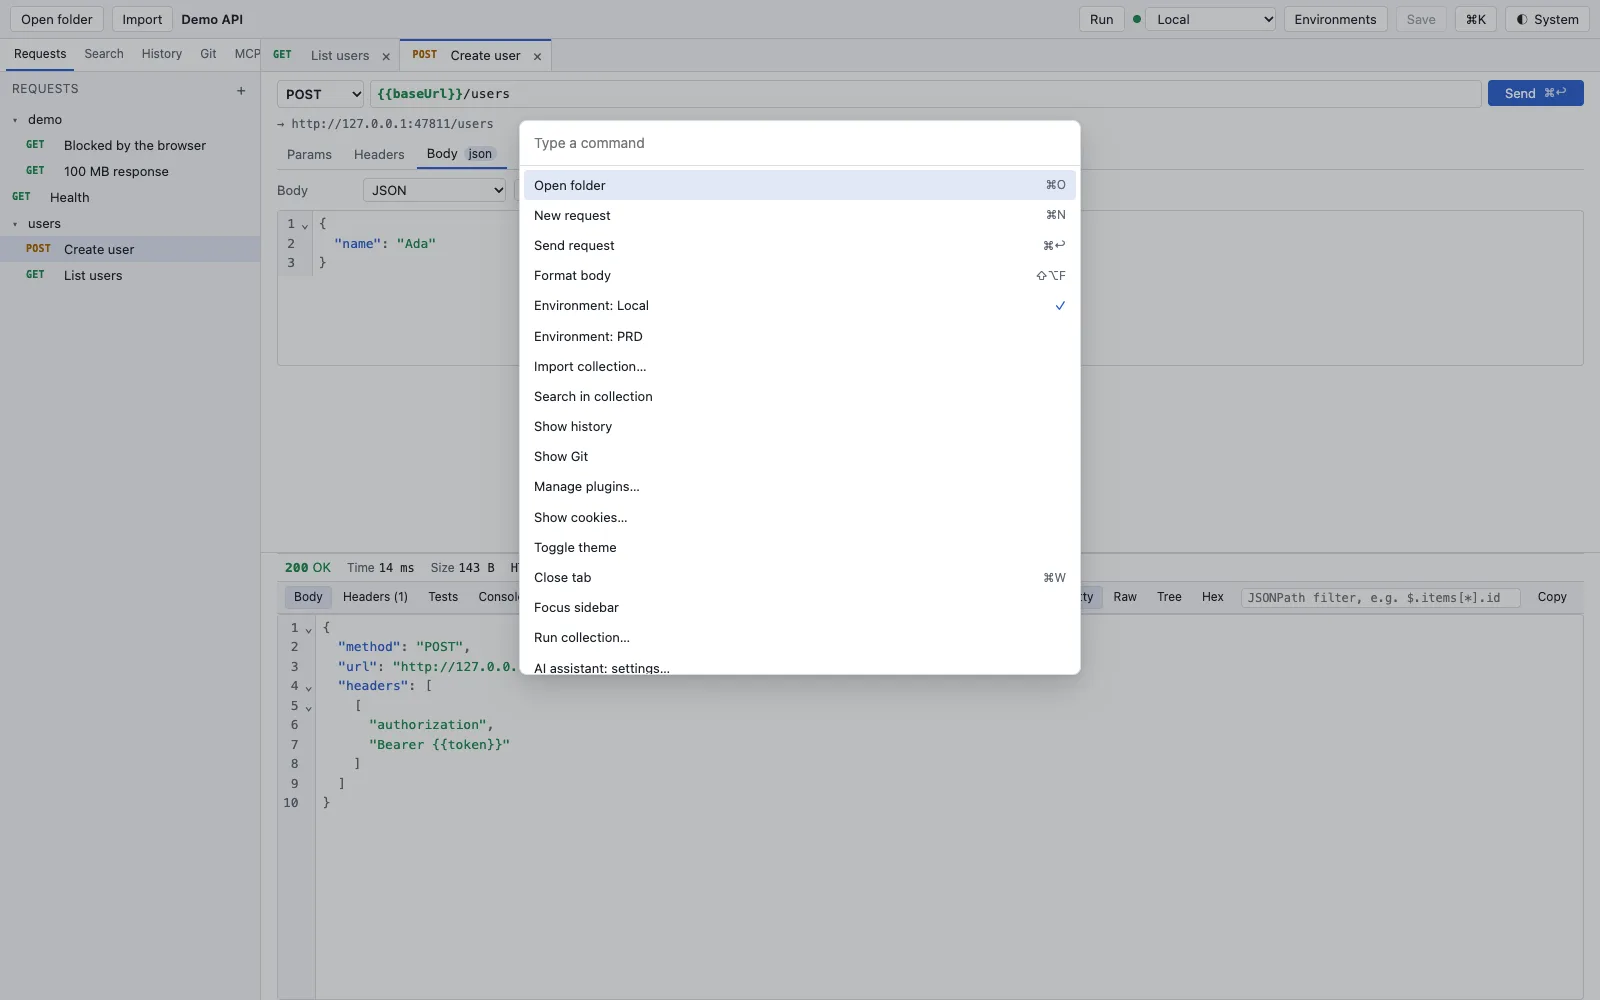
| Command | Mac | Windows, Linux |
|---|---|---|
| Send request | ⌘↩ | Ctrl+Enter |
| Save | ⌘S | Ctrl+S |
| New request | ⌘N | Ctrl+N |
| Open folder | ⌘O | Ctrl+O |
| Close tab | ⌘W | Ctrl+W |
| Command palette | ⌘K | Ctrl+K |
| Format body | ⇧⌥F | Shift+Alt+F |
The shortcuts are part of the performance budgets: sending in at most two keystrokes from app start4, measured in every build.
In a pipeline
The same request runs on the command line with the same core – what is green in the app is green in the pipeline:
rt send users/get-user.yml --env Staging --var token="$API_TOKEN" --prettyAll commands and exit codes are in rt command line.